
Home>Create & Decorate>DIY & Crafts>Rustic Pine Cone Garland: A DIY Home Improvement Project
DIY & Crafts
Rustic Pine Cone Garland: A DIY Home Improvement Project
Published: February 15, 2024

Senior Editor in Create & Decorate, Kathryn combines traditional craftsmanship with contemporary trends. Her background in textile design and commitment to sustainable crafts inspire both content and community.
Create a charming DIY rustic pine cone garland for your home with this easy and fun craft project. Perfect for adding a touch of nature to your home decor.
(Many of the links in this article redirect to a specific reviewed product. Your purchase of these products through affiliate links helps to generate commission for Twigandthistle.com, at no extra cost. Learn more)
Introduction
Creating a rustic pine cone garland is a delightful DIY project that adds a touch of natural charm to any home. This simple yet captivating decor piece brings the beauty of the outdoors inside, infusing your living space with a warm and inviting ambiance. Whether adorning a fireplace mantel, draping along a staircase, or embellishing a holiday table setting, a handmade pine cone garland exudes a cozy, rustic allure that complements various interior styles.
Crafting a pine cone garland not only allows you to unleash your creativity but also provides an opportunity to connect with nature. As you gather pine cones and transform them into a stunning garland, you'll find yourself immersed in a therapeutic and fulfilling DIY experience. The process of selecting, cleaning, and embellishing the pine cones fosters a sense of mindfulness and appreciation for the natural world, making this project a truly enriching endeavor.
Moreover, a handmade pine cone garland serves as a versatile decor element that can be customized to suit different occasions and seasons. Whether you opt for a natural, earthy look or choose to embellish the pine cones with festive colors and accents, the possibilities for personalization are endless. This DIY project empowers you to tailor the garland to your unique style and preferences, allowing you to infuse your living space with a personalized touch that reflects your creativity and individuality.
By embarking on the journey of creating a rustic pine cone garland, you not only adorn your home with a captivating decor piece but also cultivate a deeper connection with nature and unleash your artistic flair. This DIY project offers a wonderful opportunity to infuse your living space with the timeless allure of nature while indulging in a fulfilling and creative endeavor. So, gather your materials and let's embark on the enchanting journey of crafting a rustic pine cone garland to elevate the charm of your home.
Materials Needed
To embark on the enchanting DIY journey of creating a rustic pine cone garland, you'll need a handful of simple yet essential materials. These items will serve as the foundation for your project, allowing you to transform ordinary pine cones into a captivating decor piece that exudes natural charm and timeless allure. Here's a comprehensive list of the materials you'll require to bring your rustic pine cone garland to life:
-
Pine Cones: The heart of this project, pine cones can be gathered from your backyard, local park, or purchased from a craft store. Select a variety of sizes and shapes to add visual interest to your garland.
-
Cleaning Supplies: Before incorporating the pine cones into your garland, it's crucial to clean them thoroughly to remove any dirt, debris, or critters. You'll need a bowl of warm water, mild dish soap, and a soft-bristled brush to gently scrub the pine cones.
-
Protective Gear: Since pine cones can be prickly and may contain natural residues, it's advisable to wear gloves and possibly eye protection while handling and cleaning them.
-
Paint or Stain: Depending on your desired aesthetic, you can choose to paint or stain the pine cones to complement your home decor. Acrylic craft paint in earthy tones or wood stain in rich hues are ideal options for enhancing the natural beauty of the pine cones.
-
Paintbrushes or Staining Cloths: To apply the paint or stain evenly onto the pine cones, you'll need a selection of paintbrushes or staining cloths in various sizes.
-
String or Twine: Select a durable and visually appealing string or twine to string the pine cones together and create the garland. Natural jute twine or rustic burlap string can add a charming touch to the finished piece.
-
Embellishments (Optional): If you wish to add a festive or personalized touch to your garland, consider incorporating embellishments such as faux berries, small ornaments, or decorative ribbon.
-
Scissors: A pair of sharp scissors will be essential for cutting the string or twine to the desired length and trimming any excess material.
By gathering these materials, you'll be well-equipped to embark on the creative and rewarding process of crafting a rustic pine cone garland. With these simple yet essential items at your disposal, you'll have everything you need to transform humble pine cones into a captivating decor piece that infuses your home with natural charm and timeless allure.
Step 1: Gather Pine Cones
Gathering pine cones is the foundational step in creating a rustic pine cone garland, and it presents a wonderful opportunity to connect with nature and explore the outdoors. Whether you venture into your backyard, take a leisurely stroll through a local park, or embark on a nature-inspired outing, the process of collecting pine cones is a delightful and immersive experience.
When gathering pine cones, it's essential to keep an eye out for a diverse array of shapes and sizes. Look for pine cones that exhibit unique characteristics, such as varying lengths, distinct textures, and intriguing patterns. By selecting a diverse assortment of pine cones, you'll infuse your garland with visual interest and organic charm, creating a captivating decor piece that celebrates the natural beauty of these timeless treasures.
As you explore your surroundings in search of pine cones, take a moment to appreciate the serene beauty of nature. Embrace the tranquility of the outdoors, breathe in the crisp, fresh air, and allow yourself to be captivated by the simple yet enchanting allure of pine cones scattered amidst the foliage. Engaging in this mindful and immersive experience not only enriches the process of gathering pine cones but also fosters a deeper connection with the natural world, infusing your DIY project with a sense of authenticity and reverence for nature.
Once you've gathered an ample supply of pine cones, take a moment to inspect and appreciate their unique characteristics. Admire the intricate spirals, the delicate scales, and the earthy hues that define each pine cone, recognizing the inherent beauty that nature has bestowed upon these timeless treasures. By embracing the individuality of each pine cone, you'll lay the foundation for a garland that exudes organic charm and timeless allure, infusing your living space with the enchanting essence of the outdoors.
In essence, the process of gathering pine cones is not merely a practical task but a soul-enriching journey that allows you to immerse yourself in the beauty of nature. By selecting a diverse array of pine cones and embracing the serenity of the outdoors, you'll set the stage for a captivating DIY project that celebrates the timeless allure of these natural treasures. So, with your collection of pine cones in hand, let's embark on the next step of transforming these humble elements into a stunning rustic pine cone garland.
Step 2: Clean and Prep Pine Cones
Cleaning and preparing the gathered pine cones is a crucial step in the process of creating a rustic pine cone garland. This essential task ensures that the pine cones are free from dirt, debris, and potential critters, while also preparing them to receive paint or stain. By dedicating attention to this step, you'll lay the groundwork for a visually appealing and long-lasting garland that exudes the natural beauty of the pine cones.
Begin by setting up a cleaning station with a bowl of warm water and a small amount of mild dish soap. Gently submerge the pine cones in the soapy water, allowing them to soak for a few minutes. This gentle cleansing process helps loosen any dirt or residues clinging to the pine cones, preparing them for thorough cleaning.
Using a soft-bristled brush, carefully scrub each pine cone to remove any remaining dirt and debris. Pay close attention to the crevices and scales of the pine cones, ensuring that all surfaces are thoroughly cleaned. This meticulous approach not only enhances the visual appeal of the pine cones but also ensures that they are free from any potential contaminants.
After cleaning, rinse the pine cones under running water to remove the soapy residue. Once rinsed, pat them dry with a clean towel, taking care to remove excess moisture. It's important to allow the pine cones to air-dry completely before proceeding to the next step, as any residual moisture can interfere with the painting or staining process.
As you handle the pine cones during the cleaning process, it's advisable to wear gloves to protect your hands from potential prickles and natural residues. Additionally, consider using eye protection, especially if you're working with pine cones that may release particles during cleaning.
Once the pine cones are clean and dry, inspect them to ensure that they are free from any remaining debris. Take a moment to appreciate the natural beauty of the pine cones, observing their unique textures and earthy hues. This mindful inspection sets the stage for the next phase of the project, where you'll have the opportunity to enhance the visual appeal of the pine cones through painting or staining.
By meticulously cleaning and preparing the pine cones, you're not only ensuring the quality of your garland but also engaging in a process that honors the inherent beauty of these natural elements. With the pine cones now pristine and ready for the next phase, you're poised to infuse them with your creative vision, bringing forth a rustic pine cone garland that celebrates the timeless allure of nature.
Step 3: Paint or Stain Pine Cones
With the cleaned and prepped pine cones ready for transformation, the next step in creating a rustic pine cone garland involves the captivating process of painting or staining the pine cones. This pivotal phase allows you to infuse the pine cones with your desired aesthetic, whether it be a natural, earthy look or a festive, embellished appearance.
If you opt for painting the pine cones, consider selecting acrylic craft paint in a palette of earthy tones. These hues, reminiscent of the natural world, can enhance the organic charm of the pine cones while adding a touch of warmth to your garland. As you delicately apply the paint to the pine cones, envision the subtle transformation taking place, as the earthy colors imbue the pine cones with a captivating allure that celebrates the beauty of nature.
On the other hand, if you choose to stain the pine cones, explore a selection of wood stains in rich, deep hues. These stains can accentuate the natural textures and patterns of the pine cones, infusing them with a timeless elegance that harmonizes with various interior styles. As the wood stain seeps into the crevices of the pine cones, observe how it enriches their inherent beauty, creating a mesmerizing visual effect that evokes the rustic charm of the outdoors.
Whether you opt for painting or staining, the process of embellishing the pine cones presents an opportunity to unleash your creativity and infuse the garland with your personal style. Consider experimenting with different color combinations, layering techniques, or even adding subtle metallic accents to elevate the visual appeal of the pine cones. This creative exploration allows you to tailor the garland to your unique preferences, ensuring that it harmonizes seamlessly with your home decor.
As you paint or stain the pine cones, immerse yourself in the meditative rhythm of the process, allowing your creativity to flow freely. Embrace the tactile experience of transforming each pine cone, relishing the opportunity to infuse these natural elements with your artistic vision. With each brushstroke or application of stain, witness the pine cones undergo a captivating metamorphosis, evolving into enchanting adornments that will grace your rustic pine cone garland.
By embracing the transformative power of paint or stain, you're not only enhancing the visual appeal of the pine cones but also infusing them with a personalized touch that reflects your creative spirit. With the pine cones now adorned with your chosen finish, you're poised to embark on the next phase of the project, where you'll string them together to create a stunning rustic pine cone garland that exudes timeless allure and natural charm.
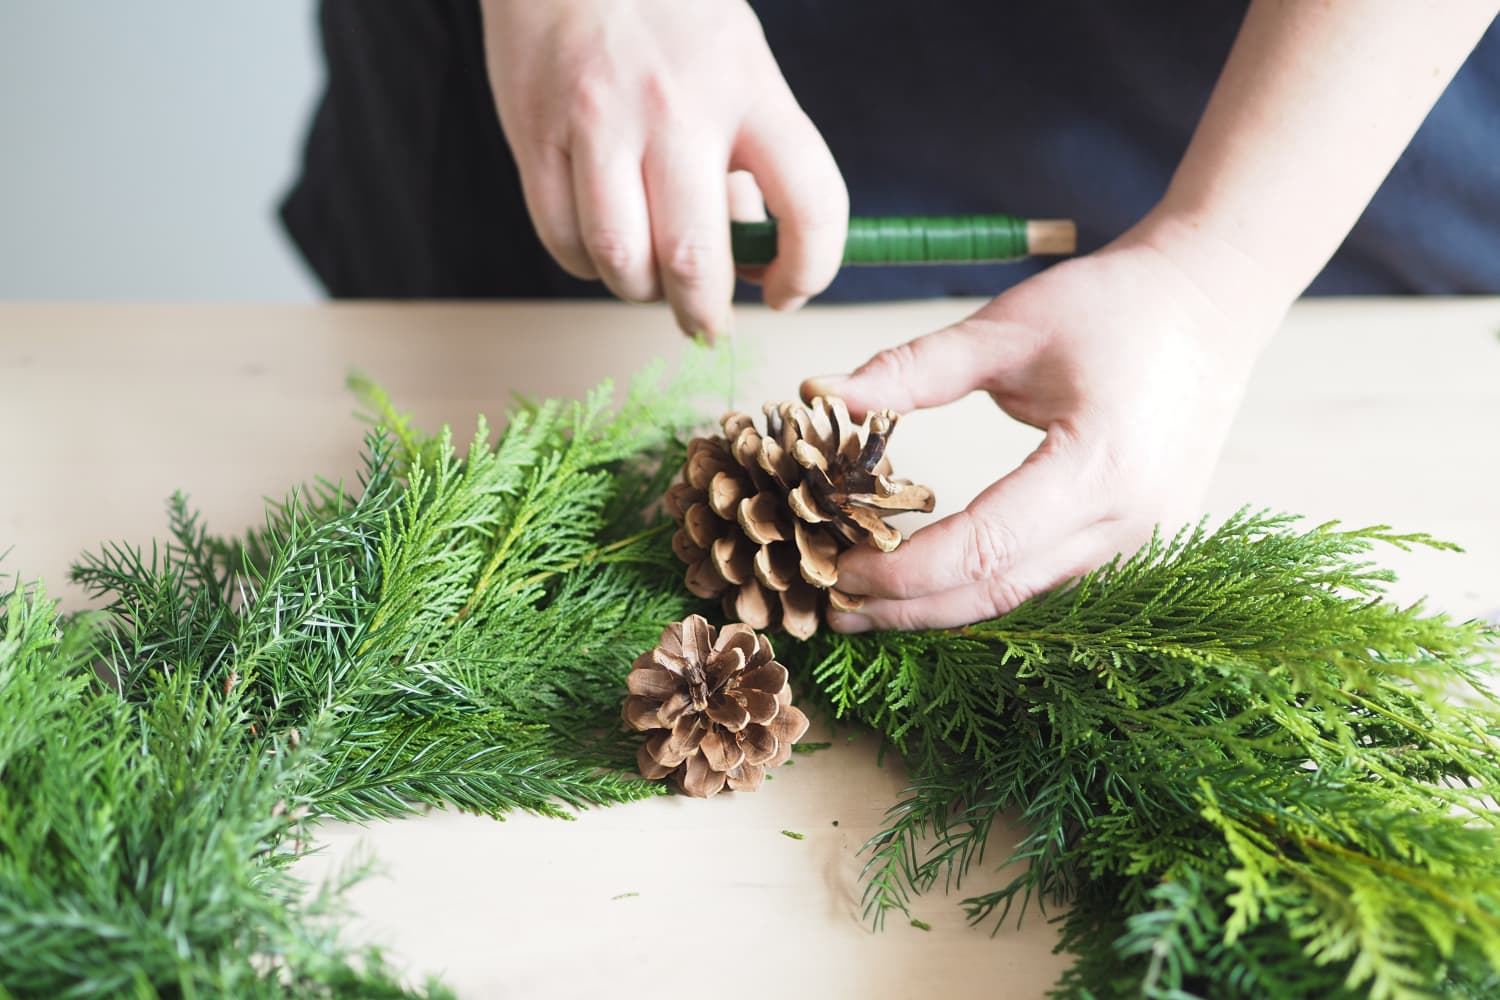
Step 4: String Pine Cones onto Garland
With the painted or stained pine cones now exuding a captivating allure, it's time to embark on the enchanting process of stringing them onto the garland. This pivotal step allows you to bring together the individual elements, creating a cohesive and visually striking rustic pine cone garland that celebrates the timeless allure of nature.
Begin by selecting a durable and visually appealing string or twine to serve as the foundation for your garland. Natural jute twine or rustic burlap string can complement the earthy aesthetic of the pine cones, adding a touch of organic charm to the finished piece. Cut the string to the desired length, ensuring that it accommodates the placement of the pine cones while allowing for additional embellishments or decorative elements.
Now, it's time to delicately thread each pine cone onto the string, taking care to space them evenly and create a harmonious visual flow. Depending on your preferred design, you can opt for a uniform arrangement of pine cones or introduce variations in spacing to add visual interest. As you string the pine cones, consider the placement of each one, envisioning how they will come together to form a captivating garland that exudes natural charm.
Embrace the tactile experience of threading the pine cones onto the string, allowing yourself to be immersed in the meditative rhythm of the process. As you handle each pine cone, appreciate the unique textures, colors, and patterns that define them, infusing the act of stringing them onto the garland with a sense of mindfulness and reverence for nature.
If you wish to enhance the garland with additional embellishments, such as faux berries, small ornaments, or decorative ribbon, consider interspersing them among the pine cones to add a festive or personalized touch. This creative exploration allows you to tailor the garland to suit different occasions or seasons, infusing it with a versatile charm that complements various interior styles.
As the pine cones and any accompanying embellishments come together on the string, observe how they form a cohesive and visually captivating ensemble. Take a moment to appreciate the natural beauty and rustic allure that emanates from the garland, recognizing the transformative journey that has brought together humble pine cones to create a stunning decor piece.
With the pine cones now elegantly strung onto the garland, you've successfully woven together the elements of nature to craft a visually striking and enchanting rustic pine cone garland. This captivating creation serves as a testament to your creativity and appreciation for the timeless allure of natural elements, infusing your living space with a warm and inviting ambiance that celebrates the beauty of the outdoors.
Step 5: Hang and Enjoy Your Rustic Pine Cone Garland
With your rustic pine cone garland now meticulously crafted, it's time to savor the gratifying culmination of your DIY endeavor by hanging and enjoying this captivating decor piece. The act of displaying your garland infuses your living space with a touch of natural charm and timeless allure, creating a warm and inviting ambiance that celebrates the beauty of the outdoors.
Select a prominent location within your home to showcase the rustic pine cone garland, such as a fireplace mantel, a staircase railing, or a focal wall. Consider the overall aesthetic of the space and choose a placement that allows the garland to take center stage, becoming a captivating focal point that draws the eye and evokes a sense of rustic elegance.
As you hang the garland, take a moment to appreciate the visual impact it brings to the surroundings. Observe how the earthy tones and organic textures of the pine cones harmonize with the existing decor, infusing the space with a cozy and inviting atmosphere. Whether adorning a mantle with seasonal accents or embellishing a bare wall with natural charm, the rustic pine cone garland effortlessly elevates the visual appeal of your home.
Once the garland is in place, step back and admire the transformative effect it has on the ambiance of the room. Embrace the enchanting presence of the garland, recognizing how it infuses the space with a sense of warmth and tranquility. The natural beauty of the pine cones, enhanced by your creative touch, serves as a captivating reminder of the timeless allure of the outdoors, bringing a touch of nature's splendor into your everyday surroundings.
As you revel in the presence of the rustic pine cone garland, take a moment to reflect on the journey that has led to this delightful creation. From the serene exploration of nature to the meticulous crafting of each pine cone, your DIY endeavor has not only adorned your home but also enriched your connection with the natural world. The garland stands as a testament to your creativity and appreciation for the simple yet captivating beauty of natural elements.
In essence, the act of hanging and enjoying your rustic pine cone garland is a celebration of the harmonious blend of creativity and nature. It serves as a reminder of the transformative power of DIY projects, infusing your living space with a personalized touch that reflects your unique style and appreciation for the timeless allure of the outdoors. As you bask in the enchanting presence of the garland, you're reminded of the joy and fulfillment that comes from infusing your home with the warmth and charm of handmade decor.