Home>Create & Decorate>DIY & Crafts>DIY Home Decor: Linea Paper Garland For A Stylish Upgrade
DIY & Crafts
DIY Home Decor: Linea Paper Garland For A Stylish Upgrade
Published: February 9, 2024

Senior Editor in Create & Decorate, Kathryn combines traditional craftsmanship with contemporary trends. Her background in textile design and commitment to sustainable crafts inspire both content and community.
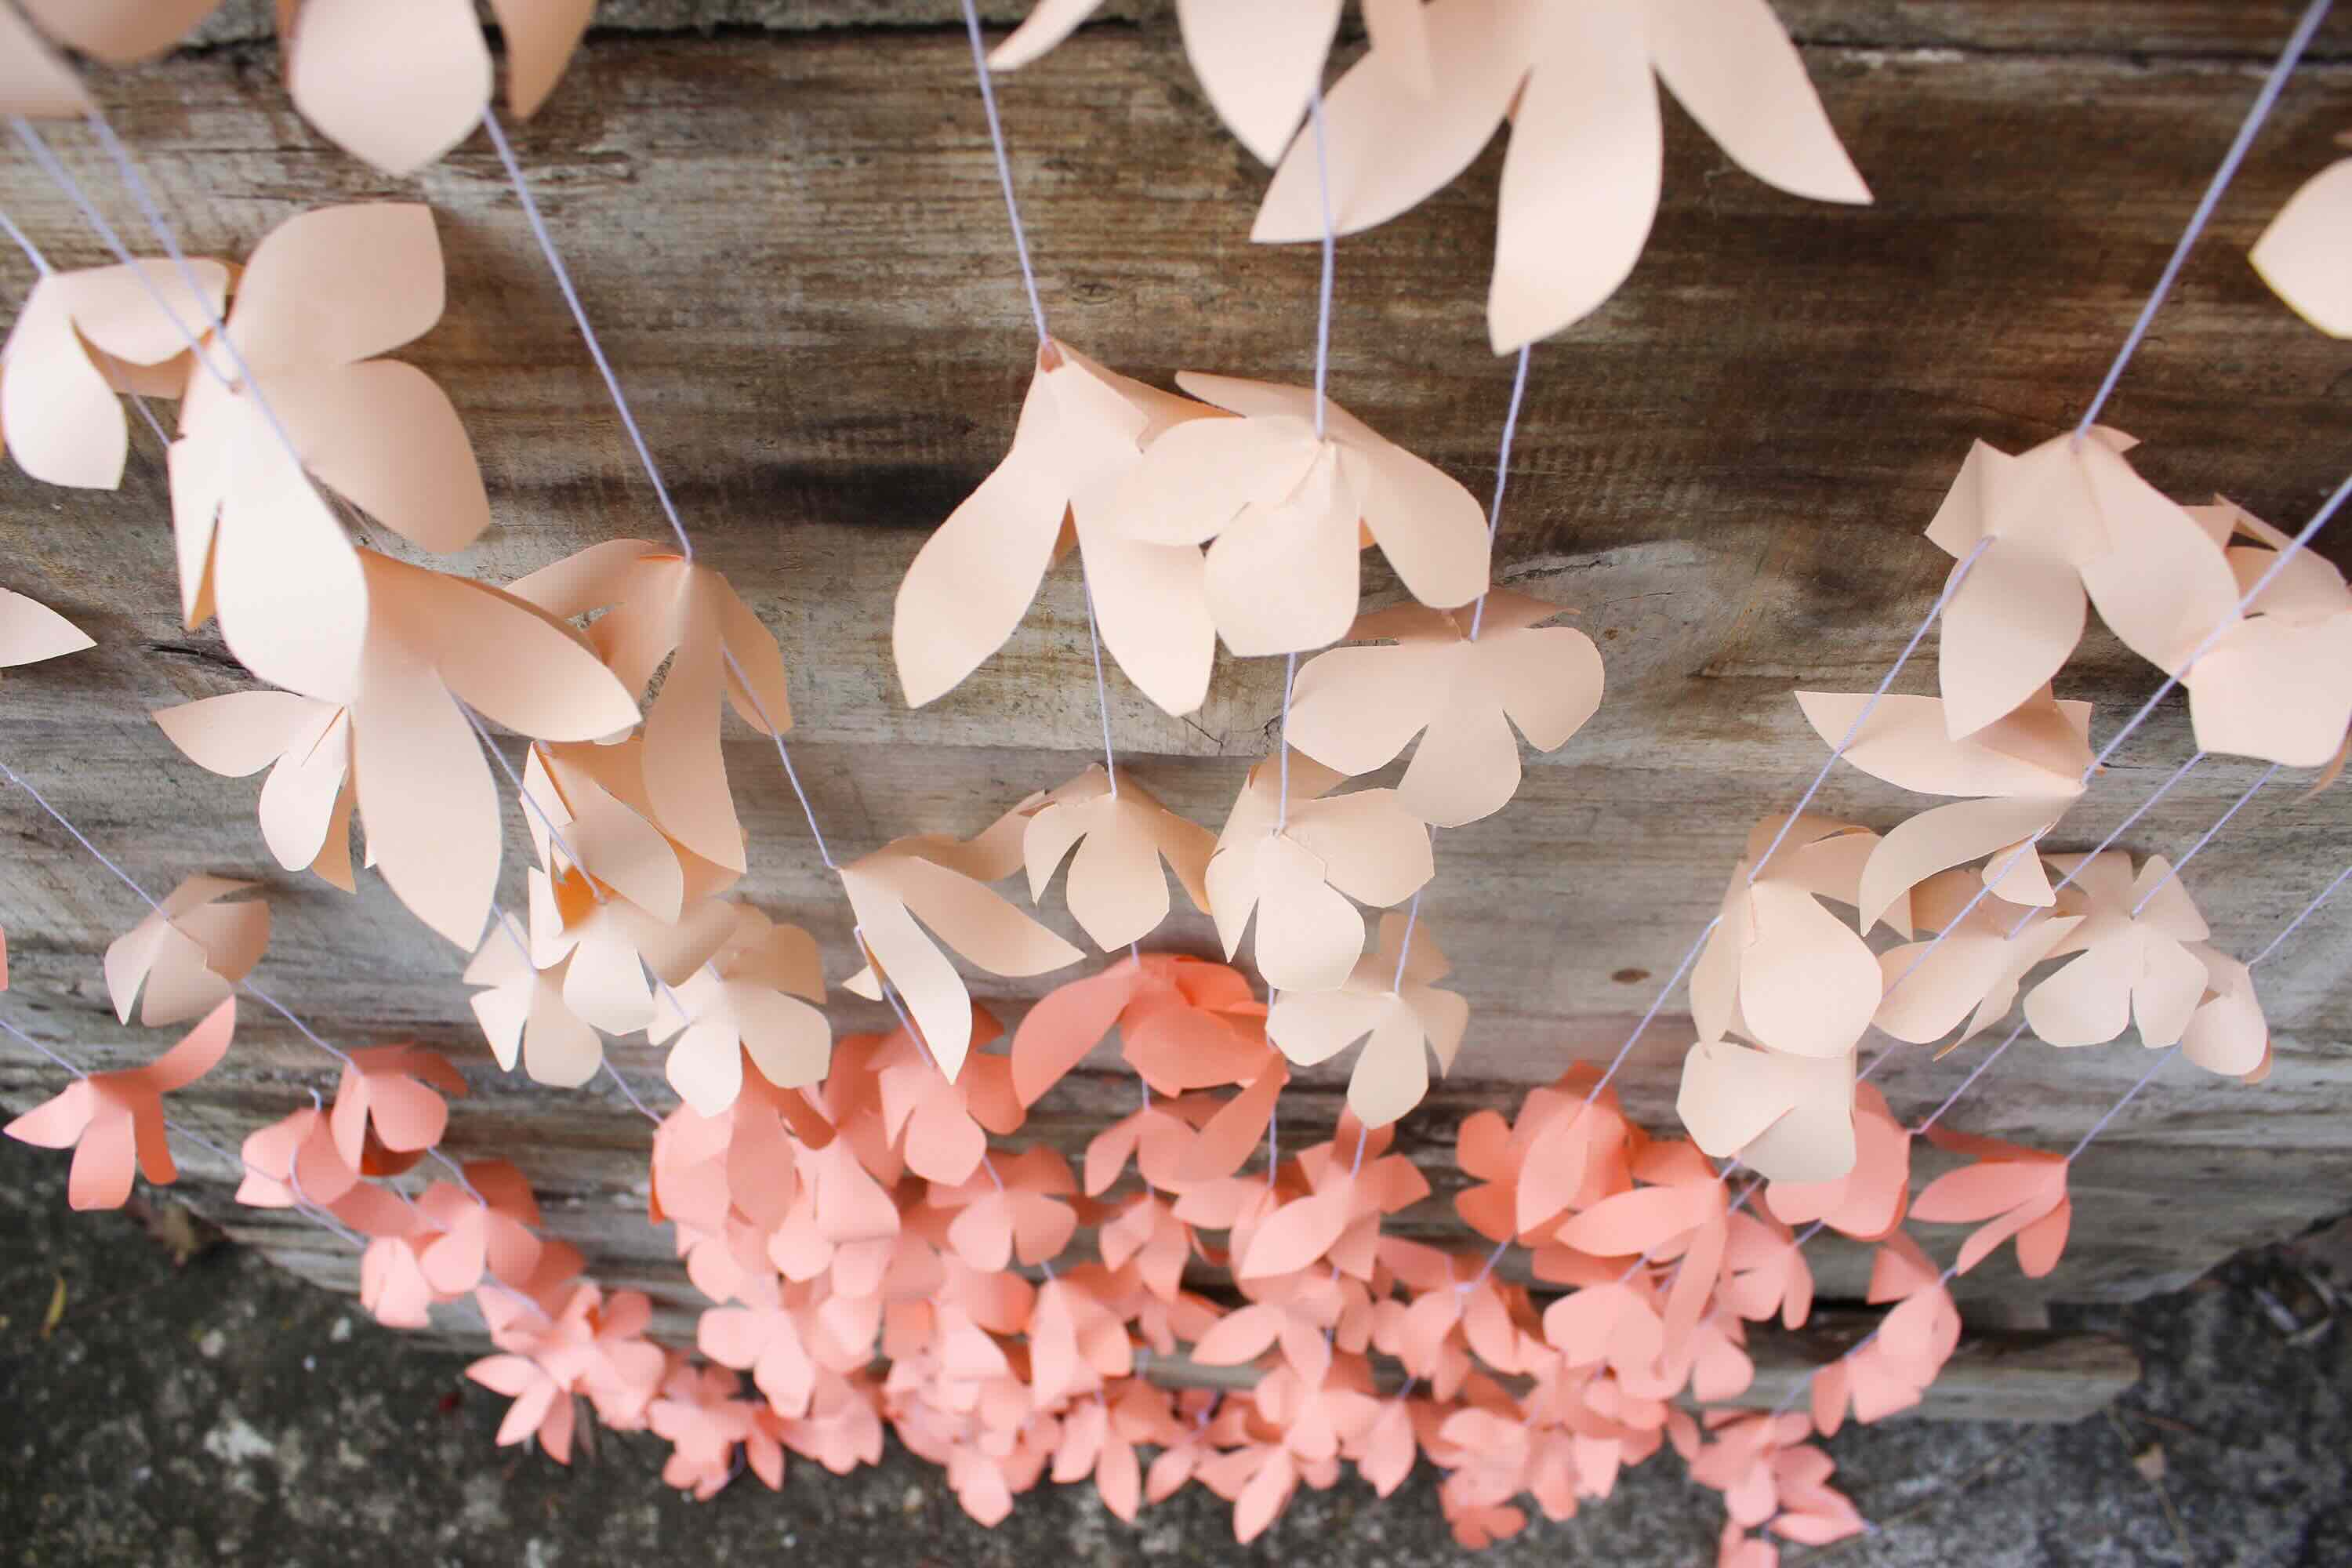
Upgrade your home decor with a stylish Linea paper garland. Get creative with this DIY project and add a personal touch to your living space. Perfect for DIY & Crafts enthusiasts!
(Many of the links in this article redirect to a specific reviewed product. Your purchase of these products through affiliate links helps to generate commission for Twigandthistle.com, at no extra cost. Learn more)
Introduction
Are you looking to add a touch of elegance and charm to your living space? Crafting your own home decor can be a rewarding and budget-friendly way to infuse personality into your surroundings. In this DIY guide, we will explore how to create a stunning Linea paper garland that will elevate the ambiance of any room. This simple yet stylish project is perfect for craft enthusiasts of all levels, offering a delightful opportunity to unleash your creativity and adorn your home with a personalized touch.
The Linea paper garland is a versatile decor piece that can be customized to suit various themes and color schemes, making it an ideal addition to any celebration or everyday decor. Whether you're sprucing up a bedroom, adding flair to a party, or simply seeking a creative outlet, this project is sure to inspire and delight. With just a few basic materials and a dash of imagination, you can craft a beautiful garland that exudes charm and sophistication.
By following the step-by-step instructions in this guide, you'll embark on a crafting journey that promises both relaxation and fulfillment. As you immerse yourself in the art of paper folding and assembly, you'll witness the transformation of simple materials into a captivating decor piece that reflects your unique style. Whether you're a seasoned crafter or a newcomer to the world of DIY, this project offers an enjoyable and accessible way to express your creativity and enhance your living space.
So, gather your materials, clear a workspace, and prepare to embark on a delightful crafting adventure. Let's dive into the enchanting world of DIY home decor and bring the Linea paper garland to life!
Materials Needed
To embark on this delightful DIY project and create your very own Linea paper garland, you'll need a handful of simple yet essential materials. These items can be easily sourced from craft stores or repurposed from everyday supplies, making this project both accessible and budget-friendly. Here's a list of the materials you'll need to get started:
-
Colored Paper: Select a range of colored or patterned paper to infuse your garland with personality and style. You can opt for a cohesive color scheme or mix and match hues for a vibrant, eclectic look.
-
Ruler and Pencil: These basic tools will come in handy for measuring and marking the paper as you prepare to cut and fold it into strips.
-
Scissors: A reliable pair of scissors is essential for cutting the paper into precise strips, ensuring a neat and polished appearance for your garland.
-
Glue Stick or Double-Sided Tape: To assemble the paper strips into elegant loops, you'll need a glue stick or double-sided tape to secure the folds and create a seamless, cohesive garland.
-
String or Twine: Choose a sturdy yet flexible string or twine to serve as the base for your garland. This will allow you to easily hang and display your creation once it's complete.
-
Hole Punch: A standard single-hole punch will be useful for creating small perforations in the paper, enabling you to thread the string through the loops and assemble the garland with ease.
-
Optional Embellishments: If you're feeling particularly creative, consider incorporating additional embellishments such as glitter, sequins, or small decorative elements to add a touch of sparkle and charm to your garland.
By gathering these materials, you'll be well-equipped to embark on the crafting journey that awaits. With a splash of color, a dash of creativity, and a sprinkle of imagination, you'll soon transform these basic supplies into a stunning Linea paper garland that will breathe new life into your living space. So, gather your materials and let's dive into the enchanting world of DIY home decor!
Step 1: Cutting the Paper Strips
To begin crafting your Linea paper garland, the first step involves cutting the colored paper into uniform strips. This process sets the foundation for the elegant loops that will form the garland, allowing you to unleash your creativity and infuse the project with your desired color palette. Here's a detailed guide to cutting the paper strips and preparing them for the subsequent folding and assembly:
-
Select Your Paper: Choose a selection of colored or patterned paper that resonates with your aesthetic vision for the garland. Whether you opt for soothing pastels, vibrant jewel tones, or a mix of complementary hues, the choice is yours. This is an opportunity to express your personal style and set the tone for the decor piece that will adorn your living space.
-
Measure and Mark: Using a ruler and pencil, measure and mark the paper to create strips of uniform width. The dimensions can be tailored to your preference, but a standard width of approximately 1 inch works well for creating visually appealing loops. Precision is key at this stage, as accurately cut strips will contribute to the polished and professional appearance of the finished garland.
-
Cutting the Strips: With your marked lines as a guide, carefully use scissors to cut along the measured strips. Exercise patience and attention to detail during this process, ensuring that the edges are clean and straight. Consistency in the width of the strips will contribute to a cohesive and visually pleasing result.
-
Variety and Contrast: If you're aiming for a dynamic and eye-catching garland, consider incorporating a variety of colors and patterns. Experiment with different combinations to create an engaging visual rhythm, alternating between shades and designs to add depth and character to the garland.
By meticulously cutting the paper into uniform strips and embracing a diverse color palette, you're laying the groundwork for a captivating Linea paper garland that will exude charm and sophistication. With the paper strips prepared, you're now ready to embark on the next step of folding and assembling the loops, bringing your vision to life one meticulous fold at a time.
Step 2: Folding the Paper Strips
With the paper strips meticulously cut and ready for transformation, the next step in creating your Linea paper garland involves the art of folding. This process infuses the strips with graceful loops, setting the stage for the elegant and dynamic form of the garland. As you embark on this step, you'll witness the transformation of simple paper into a visually captivating decor piece that will breathe new life into your living space.
To fold the paper strips with precision and finesse, follow these detailed instructions:
-
Create the Initial Fold: Begin by taking a paper strip and folding it in half lengthwise, ensuring that the edges align seamlessly. Press along the fold to secure it in place, emphasizing the importance of crisp and neat creases for a polished result.
-
Forming the Loop: After the initial fold, bring the two ends of the strip together to create a loop, with the folded edge serving as the foundation. Secure the ends in place, ensuring that the loop maintains its shape and symmetry.
-
Securing the Fold: To maintain the integrity of the loop, apply a small amount of glue along the overlapping ends or use double-sided tape to secure the fold. This step ensures that the loops retain their elegant form and remain cohesive as you assemble the garland.
-
Repeat and Refine: With the first loop crafted, repeat the folding process with the remaining paper strips, creating a series of uniform loops that harmonize with your chosen color palette and design vision. Consistency in the size and shape of the loops will contribute to the overall visual impact of the garland.
-
Embrace Creativity: As you fold the paper strips, consider experimenting with variations in loop size and shape to add visual interest to the garland. You can create loops of different dimensions, allowing for a dynamic and engaging composition that captures the eye.
By embracing the art of folding and meticulously crafting each loop, you're infusing the Linea paper garland with elegance and charm. The precision and care invested in this step will yield a visually stunning decor piece that reflects your creativity and attention to detail. With the paper strips transformed into graceful loops, you're now poised to assemble the garland and witness the culmination of your crafting journey.
Step 3: Assembling the Garland
As you transition from folding the paper strips to assembling the Linea paper garland, you're poised to witness the transformation of individual loops into a cohesive and visually captivating decor piece. This step marks the culmination of your meticulous crafting journey, as you bring together the elements you've prepared to create a stunning garland that will elevate the ambiance of any room.
To assemble the garland with precision and finesse, follow these detailed instructions:
-
Lay Out the Loops: Begin by arranging the folded paper loops in the desired sequence and pattern. This initial step allows you to visualize the composition of the garland and ensure a balanced distribution of colors and shapes. By laying out the loops, you can experiment with different arrangements to achieve a visually appealing and harmonious design.
-
Secure the Loops: Once you've established the layout, proceed to secure the loops in place. Using a glue stick or double-sided tape, affix the loops to a sturdy string or twine, ensuring that they are evenly spaced and aligned. This process demands attention to detail, as the seamless assembly of the loops will contribute to the polished and professional appearance of the garland.
-
Create a Cohesive Flow: As you attach the loops to the string, strive to maintain a cohesive flow and rhythm throughout the garland. Consistency in spacing and alignment will contribute to a visually pleasing result, allowing the garland to exude elegance and charm when displayed in your living space.
-
Embellish and Personalize: If you're inclined to add a touch of flair and individuality to your garland, consider incorporating optional embellishments at this stage. Whether it's a sprinkle of glitter, a dash of sequins, or small decorative elements, these additions can infuse the garland with a personalized touch, reflecting your unique style and creativity.
-
Ensure Stability: As you progress with the assembly, periodically assess the stability and durability of the garland. Tug gently on the string to confirm that the loops are securely attached and that the garland maintains its intended form. This step ensures that your creation will withstand handling and display with grace and poise.
By meticulously assembling the loops into a cohesive garland, you're bringing your vision to life and creating a decor piece that embodies your creativity and attention to detail. With the garland taking shape, you're now ready to proceed to the final step of hanging and displaying your exquisite creation, allowing it to breathe new life into your living space.
Step 4: Hanging the Garland
With the Linea paper garland meticulously assembled, the final step involves the enchanting act of hanging and displaying your exquisite creation. This pivotal stage not only marks the culmination of your crafting journey but also sets the stage for the garland to breathe new life into your living space, infusing it with elegance and charm.
To hang the garland with finesse and precision, follow these detailed instructions:
-
Selecting the Display Location: Begin by identifying the ideal location to showcase your Linea paper garland. Whether it's adorning a bare wall, embellishing a mantelpiece, or adding flair to a festive celebration, the choice of display location sets the tone for the ambiance it will exude.
-
Securing the Garland: Once you've chosen the display location, proceed to secure the garland in place. Utilize removable adhesive hooks, transparent tape, or decorative clips to affix the string to the chosen surface. Exercise care and attention to detail during this step, ensuring that the garland hangs evenly and gracefully.
-
Creating Visual Impact: As you hang the garland, step back to assess its visual impact and adjust its positioning as needed. Strive to achieve a balanced and harmonious display, allowing the loops to cascade elegantly and capture the eye with their vibrant colors and graceful forms.
-
Embracing Versatility: The Linea paper garland's versatility allows it to adapt to various display options. Whether draped along a wall, suspended from a ceiling, or embellishing a piece of furniture, the garland can effortlessly transform the ambiance of any space, infusing it with a touch of whimsy and sophistication.
-
Celebrating Your Creativity: As the garland takes its place in the chosen display location, take a moment to celebrate your creativity and craftsmanship. Revel in the beauty of your creation and the joy it brings to the surroundings, knowing that your efforts have yielded a stunning decor piece that reflects your unique style and vision.
By hanging the Linea paper garland with care and intention, you're not only showcasing your creation but also inviting a sense of enchantment and allure into your living space. Whether it's a daily delight or a focal point for a special occasion, the garland stands as a testament to your creativity and dedication, infusing the surroundings with a touch of handmade elegance.
With the garland proudly displayed, you've completed the enchanting journey of crafting a Linea paper garland, and your living space now bears the mark of your creativity and artistry. As you admire the garland's graceful presence, revel in the satisfaction of bringing a touch of handmade charm to your surroundings, knowing that your creation has added a delightful and personalized touch to your home.
Conclusion
In conclusion, the journey of creating a Linea paper garland has been a delightful exploration of creativity, craftsmanship, and the transformative power of DIY home decor. From the meticulous cutting of paper strips to the graceful assembly and hanging of the garland, this project has offered a fulfilling opportunity to infuse living spaces with elegance and charm.
As the garland takes its place in the chosen display location, it stands as a testament to the artistry and dedication poured into its creation. Each loop, meticulously folded and assembled, reflects the care and attention to detail that have gone into crafting a decor piece that exudes personality and style.
The Linea paper garland's versatility is a testament to its ability to adapt to various themes and color schemes, making it an ideal addition to everyday decor or special celebrations. Whether it's adorning a bedroom, embellishing a party, or adding flair to a festive gathering, the garland effortlessly elevates the ambiance, infusing it with a touch of whimsy and sophistication.
As we celebrate the completion of this enchanting project, it's important to recognize the joy and fulfillment that DIY home decor brings. The act of creating something beautiful with our own hands not only enhances our living spaces but also nurtures a sense of accomplishment and pride.
The Linea paper garland, with its vibrant colors and graceful loops, serves as a reminder of the beauty that can be woven into everyday life through creativity and imagination. It stands as a symbol of the transformative power of DIY home decor, offering a budget-friendly and rewarding way to express individuality and add a personalized touch to our surroundings.
So, as you admire the garland's presence and the enchanting ambiance it creates, take pride in the knowledge that your creativity has left an indelible mark on your living space. Embrace the joy of crafting and the beauty of handmade decor, knowing that each loop of the garland reflects your unique style and vision, adding a touch of elegance and charm to your home.