
Home>Create & Decorate>DIY & Crafts>DIY Easter Basket: Creative Home Improvement Ideas For A Festive Touch
DIY & Crafts
DIY Easter Basket: Creative Home Improvement Ideas For A Festive Touch
Published: February 9, 2024

Content Creator specializing in woodworking and interior transformations. Caegan's guides motivate readers to undertake their own projects, while his custom furniture adds a personal touch.
Get inspired with our DIY Easter basket ideas for a festive touch! Explore creative home improvement projects and crafts to elevate your holiday decor. Discover DIY & Crafts tips now!
(Many of the links in this article redirect to a specific reviewed product. Your purchase of these products through affiliate links helps to generate commission for Twigandthistle.com, at no extra cost. Learn more)
Introduction
Easter is a time of joy, renewal, and celebration. It's a time when families come together to enjoy the beauty of spring and create lasting memories. One of the most beloved traditions during this festive season is the exchange of Easter baskets. These delightful baskets are not only a symbol of the season but also a wonderful way to show your loved ones how much you care.
Creating a DIY Easter basket is a fantastic opportunity to unleash your creativity and add a personal touch to your celebrations. Whether you're making a basket for your children, friends, or family members, the process of crafting a unique Easter basket can be incredibly rewarding. From selecting the perfect basket to filling it with delightful treats and decorations, there are countless ways to infuse your basket with charm and personality.
In this article, we'll explore the art of crafting a DIY Easter basket, offering a plethora of creative home improvement ideas to elevate your festive touch. From choosing the right basket to personalizing it with thoughtful details, we'll guide you through each step, providing inspiration and tips to help you create a one-of-a-kind Easter basket that will bring joy to its recipient. So, let's dive into the world of DIY Easter baskets and discover the joy of crafting a beautiful and meaningful gift for your loved ones.
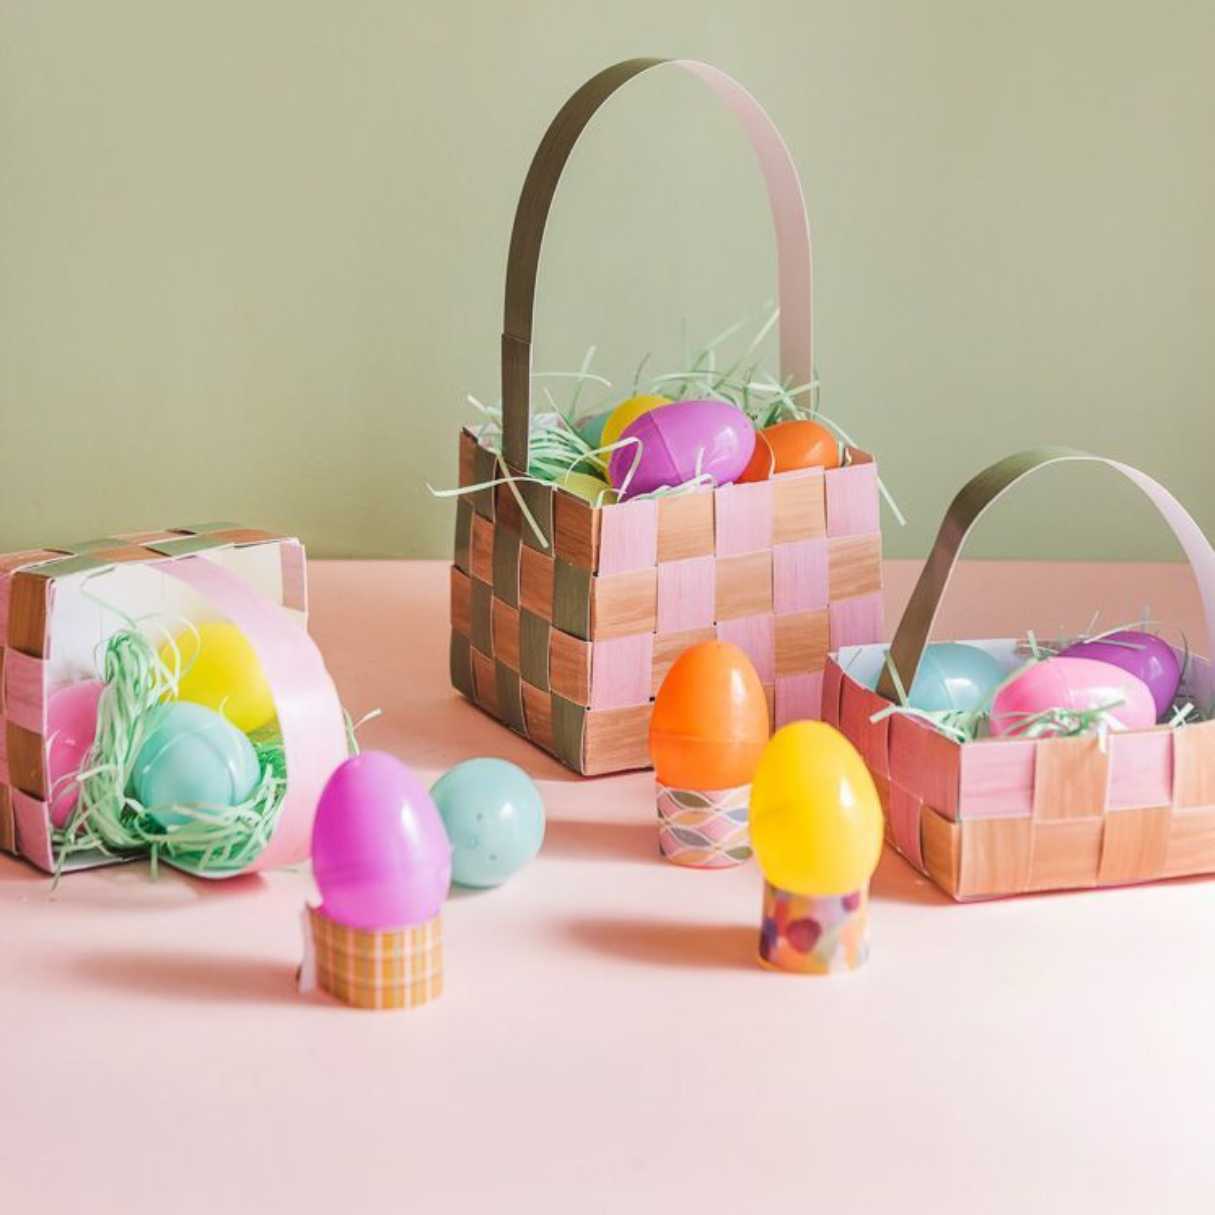
Choosing the Right Basket
When it comes to creating a DIY Easter basket, selecting the right base is the first crucial step. The basket serves as the foundation for your creative endeavor, setting the stage for the delightful treats and decorations that will adorn it. Here are some tips to help you choose the perfect basket for your DIY Easter project:
-
Size Matters: Consider the size of the basket in relation to the items you plan to include. If you're aiming for a generous assortment of goodies, opt for a larger basket that can accommodate everything without appearing overcrowded. On the other hand, a smaller basket can create a charming and intimate display for a more modest selection of treats.
-
Material and Texture: The material of the basket can significantly impact its overall aesthetic. Wicker baskets exude a classic, rustic charm, while fabric-lined baskets offer a softer and more elegant appeal. Consider the texture of the basket as well; a smooth finish may complement a modern and sleek design, while a more rustic texture can enhance a traditional or vintage look.
-
Theme and Color: Think about the theme or color scheme you want to incorporate into your Easter basket. If you're aiming for a vibrant and playful vibe, opt for a brightly colored basket that complements the festive spirit of Easter. Alternatively, a neutral or pastel-colored basket can provide a versatile canvas for a more understated and elegant presentation.
-
Practicality: Consider the practicality of the basket beyond its decorative appeal. A sturdy and durable basket will ensure that your carefully curated contents are well-supported and secure. Additionally, a basket with a handle can add convenience, allowing for easy transportation and a charming presentation.
-
Personal Preference: Ultimately, let your personal style and preferences guide your choice. Whether you prefer a traditional woven basket, a modern wire design, or a quirky alternative such as a decorative tin pail or a fabric tote, select a basket that resonates with your creative vision and reflects the personality of the recipient.
By carefully considering these factors, you can choose a basket that not only complements your DIY Easter basket theme but also serves as a delightful vessel for your thoughtful creations. The right basket will set the stage for a stunning presentation and ensure that your Easter gift is as beautiful on the outside as it is on the inside.
Decorating the Basket
Once you have selected the perfect basket as the foundation for your DIY Easter creation, it's time to infuse it with charm and personality through thoughtful decorations. Decorating the basket is where your creativity can truly shine, as you have the opportunity to tailor the design to suit the recipient's preferences and the overall theme of your Easter celebration.
1. Ribbon and Bow
Adding a vibrant ribbon and a charming bow to the handle of the basket instantly elevates its visual appeal. Choose a ribbon in a color that complements the overall color scheme of your Easter basket. Whether it's a pastel hue for a soft and elegant look or a bold, eye-catching color for a playful touch, the ribbon and bow serve as delightful accents that tie the entire presentation together.
2. Faux Flowers and Greenery
Incorporating faux flowers and greenery can bring a touch of natural beauty to your Easter basket. Consider tucking small sprigs of artificial flowers or greenery around the edges of the basket or weaving them into the handle. This simple addition can infuse the basket with a sense of freshness and springtime charm, enhancing its visual appeal.
3. Personalized Tags or Ornaments
To add a personalized touch, consider attaching a decorative tag or ornament to the basket. You can opt for a custom-made tag with the recipient's name or a heartfelt message, or choose a themed ornament that reflects the recipient's interests or hobbies. This small detail adds a thoughtful and personalized element to the basket, making it truly special.
4. Easter Themed Embellishments
Embrace the spirit of Easter by incorporating themed embellishments such as miniature Easter eggs, bunny figurines, or decorative chicks. These whimsical additions not only capture the essence of the season but also infuse the basket with a sense of joy and festivity. Scatter these charming embellishments throughout the basket to create a delightful and enchanting display.
5. Tulle or Fabric Liner
For an added touch of elegance, consider lining the inside of the basket with tulle or a fabric liner. This soft and delicate material can create a beautiful backdrop for the contents of the basket, adding a layer of sophistication to the presentation. Choose a fabric that complements the overall aesthetic of the basket and enhances its visual appeal.
By incorporating these decorative elements, you can transform a simple basket into a stunning and personalized Easter creation. Each embellishment serves to enhance the basket's visual appeal and create a captivating presentation that will delight the recipient. With careful attention to detail and a touch of creativity, decorating the basket becomes a delightful and fulfilling part of the DIY Easter basket crafting process.
Filling the Basket
Filling the Easter basket is where the magic truly happens. This is the stage where you get to curate a delightful assortment of treats and treasures that will bring joy to the recipient. The key to a successful filling lies in striking a balance between variety, visual appeal, and personalization. Here's how you can expertly fill your DIY Easter basket with an array of delightful goodies:
1. Easter Treats
The cornerstone of any Easter basket is, of course, the treats. From classic chocolate eggs and bunnies to colorful candy-coated delights, the options are endless. Consider the recipient's preferences and dietary restrictions when selecting treats, and opt for a mix of indulgent chocolates, playful candies, and perhaps some gourmet treats for a touch of sophistication.
2. Handmade Crafts
Infuse your Easter basket with a touch of DIY charm by including handmade crafts or small trinkets. This could be anything from a personalized keychain or a hand-painted egg to a homemade scented candle or a crafted piece of jewelry. These thoughtful additions add a unique and personal touch to the basket, showcasing your creativity and care.
3. Springtime Surprises
Embrace the spirit of spring by incorporating seasonal surprises into the basket. Consider adding items such as a packet of flower seeds, a small potted plant, or a whimsical butterfly-shaped trinket. These springtime surprises not only complement the Easter theme but also symbolize growth, renewal, and the beauty of the season.
4. Books or Stationery
For a thoughtful and enduring gift, consider including a book or a set of stationery in the Easter basket. Select a book that aligns with the recipient's interests or opt for a beautifully illustrated children's book for a younger recipient. Alternatively, a set of high-quality stationery, such as notebooks, pens, or artistic supplies, can inspire creativity and serve as a lasting memento.
5. Personalized Touches
To elevate the sentiment behind the Easter basket, consider adding personalized touches that hold sentimental value. This could be a handwritten note expressing your well wishes, a framed photograph capturing a cherished memory, or a small token that holds significance to the recipient. These personalized elements infuse the basket with warmth and thoughtfulness, making it truly special.
By carefully curating a diverse and thoughtful selection of items, you can transform a simple basket into a treasure trove of delights. The art of filling the Easter basket lies in creating a harmonious blend of treats, treasures, and personal touches that reflect the spirit of the season and the personality of the recipient. With a thoughtful approach and a dash of creativity, filling the basket becomes a joyous and meaningful endeavor.
Personalizing the Basket
Personalizing the Easter basket is a heartfelt and meaningful way to tailor the gift to the recipient's preferences and create a truly memorable and cherished present. By infusing the basket with personalized touches, you can convey thoughtfulness, warmth, and a deep sense of connection, elevating the gift to a whole new level of significance.
1. Customized Name or Initials
Adding the recipient's name or initials to the basket can instantly create a sense of ownership and exclusivity. Consider incorporating a custom-made name tag or monogrammed embroidery on the basket itself. This simple yet impactful detail not only personalizes the gift but also serves as a lasting memento that the recipient can cherish long after the Easter celebrations.
2. Tailored Selection of Treats and Gifts
Personalization extends beyond the exterior of the basket to the contents within. Tailor the selection of treats and gifts to reflect the recipient's preferences, hobbies, and interests. Whether it's a favorite type of chocolate, a special edition of a beloved book, or a unique item that holds sentimental value, curating a personalized assortment of goodies demonstrates a deep understanding of the recipient and adds an extra layer of thoughtfulness to the gift.
3. Handwritten Notes or Messages
Incorporating handwritten notes or messages adds a deeply personal and emotional dimension to the Easter basket. Take the time to craft a heartfelt message expressing your love, well wishes, and appreciation for the recipient. Whether it's a simple "Happy Easter" or a more elaborate expression of gratitude and affection, the handwritten note conveys a sense of intimacy and authenticity, making the gift truly special.
4. Reflecting Hobbies and Passions
Consider the recipient's hobbies and passions when personalizing the basket. If the recipient is an avid gardener, include gardening tools or a packet of rare flower seeds. For a music enthusiast, consider adding a small musical instrument or a collection of their favorite tunes. By aligning the contents of the basket with the recipient's interests, you demonstrate a deep level of consideration and create a gift that resonates on a personal level.
5. Thoughtful Keepsakes
Including thoughtful keepsakes in the Easter basket can create lasting memories and evoke sentimental emotions. This could be a small trinket that holds special significance, a symbolic item that represents a shared experience, or a cherished memento that embodies a meaningful connection. These keepsakes serve as tangible reminders of your bond with the recipient and add a profound sense of personalization to the gift.
By infusing the Easter basket with these personalized elements, you transform it into a deeply meaningful and cherished gift. The act of personalizing the basket goes beyond mere customization; it reflects a genuine desire to create a gift that resonates with the recipient on a profound and emotional level, making the Easter celebration truly unforgettable.
Conclusion
Crafting a DIY Easter basket is a delightful and fulfilling endeavor that allows you to infuse the spirit of the season with your creativity and thoughtfulness. From selecting the perfect basket to adorning it with charming decorations, filling it with delightful treats and treasures, and personalizing it with heartfelt touches, every step of the process is an opportunity to create a meaningful and cherished gift for your loved ones.
As you embark on the journey of crafting a DIY Easter basket, remember that the true essence of this tradition lies in the joy of giving and the spirit of celebration. Whether you're creating a basket for a child, a friend, a family member, or even yourself, the act of crafting a personalized and thoughtful Easter basket is a beautiful way to express love, appreciation, and the joy of togetherness.
As you carefully select each item and adorn the basket with decorative touches, envision the delight and happiness it will bring to the recipient. The process of crafting a DIY Easter basket is not merely about the physical creation; it's about the emotional connection and the joy that it embodies. It's a gesture of love and care, a symbol of the beauty of spring, and a reflection of the cherished traditions that bring us closer together.
In the midst of the creative process, remember to infuse the basket with your unique personality and the personality of the recipient. Let your creativity flow, and allow the basket to become a canvas for your heartfelt expressions. Whether it's a whimsical touch, a personalized detail, or a carefully selected treat, each element contributes to the narrative of the basket, creating a story of love, joy, and shared moments.
As you present your DIY Easter basket to its recipient, witness the joy and appreciation that it evokes. The delight in their eyes, the warmth of their smile, and the shared moments of happiness are the true rewards of your creative endeavor. The Easter basket becomes a tangible symbol of your thoughtfulness and care, a token of love that transcends the material realm and resonates on a deeply emotional level.
In conclusion, crafting a DIY Easter basket is a beautiful fusion of creativity, love, and tradition. It's a testament to the joy of giving and the art of thoughtful gestures. As you immerse yourself in the process, savor every moment, and let the spirit of Easter guide your hands and heart. Embrace the joy of creation, the warmth of connection, and the beauty of sharing, for in the act of crafting a DIY Easter basket, you are not only creating a gift but also weaving a tapestry of love and cherished memories.